Pages

Monday, January 30, 2012

How to properly store your fabric stash


Whether you are new or avid sewer, it is important you know how to properly store your fabric to maintain color, texture, and quality. I recently set up my crafting space and was astounded at the amount of fabric I had collected.  I knew I needed a better system. My husbands been calling me "squirrel" because I had stuff stashed everywhere, much like a squirrel stores acorns in the winter. Before I decided what method to use for my fabric storage, I did a little research. Later on in this post I'll talk about how I store my fabric, but for now I'll give you storage basics.

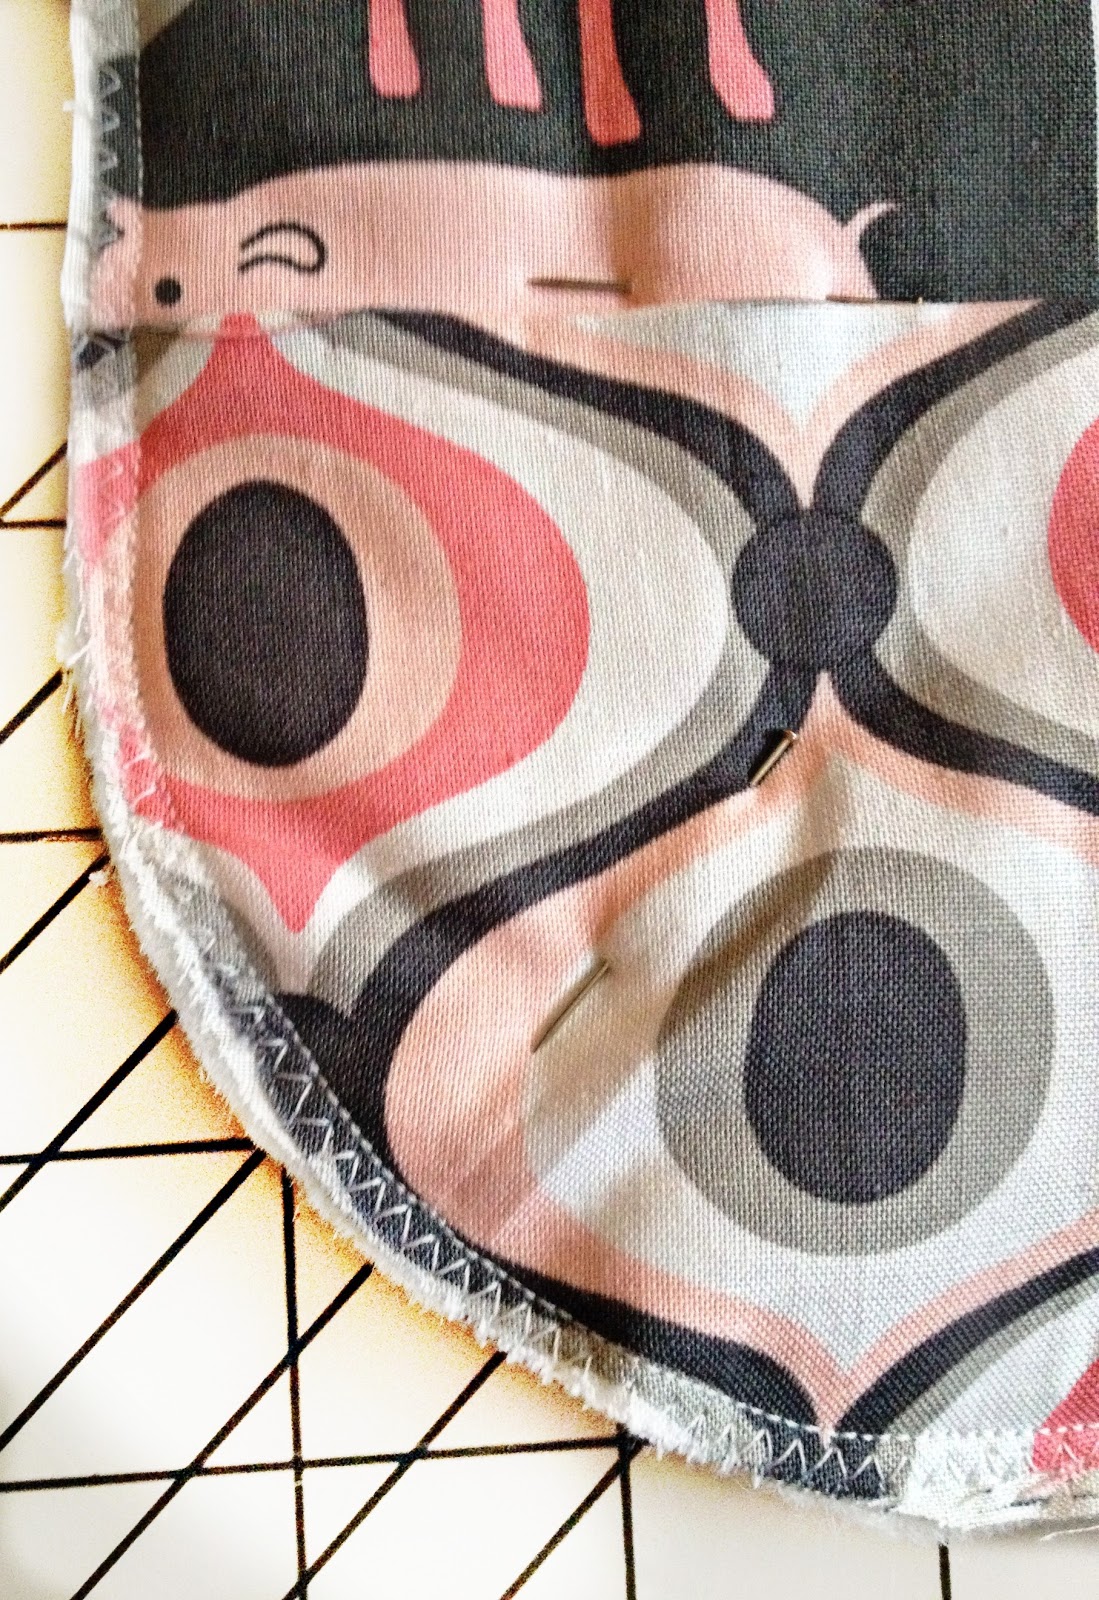
  • You'll always want to pre-wash your fabric, that way, it's ready to go when you are. If you're washing a cotton or any other material that frays, be sure to use a zig-zag or overlock stitch on any raw edges to prevent fraying while washing
  • Keep fabric out of direct sunlight to prevent fading
  • If you choose to store fabric in a plastic container, its best to be see through so you can see what fabric is in each tub. Be sure to drill holes into the top to allow the fabric to breath. Fabric that is unable to breath can become musty or mildewy smelling.
  • If you are working with fabric you want to keep perfect, place a sheet or two of acid free tissue paper on both sides of fabric to avoid color bleeding. 
  • If your fabric is hanging in the store (like velvet), its hanging for a reason and should be kept hanging. Folding could crush any nap, ruining your fabric.
  • If you choose to wrap your fabric on a bolt, be 100% certain it is acid free. Cardboard containing acid could discolor your pretty fabric.
 
Of course there is no right or wrong way to fold your fabric, but there are a few ways to make everything neater, cleaner, and more organized. In general, the neater your fabric is, the more you can store less space it takes up. There are a few methods to fold and store your stash. 

If you plan on folding your fabric, using something that is the same size is very helpful.
It's best to fold fabric right out of the dryer. Grab a household item that is about the width you want to stack your fabric at. Book, small cutting board, cutting mat, etc. I used my husbands masters degree from Virginia Tech :)

Fold fabric selvedge to selvedge (The edge of the fabric that comes finished from the manufacturer. It is often marked with information such as color code and other identifying data ) with the printed side up and closest to you

Now fold fabric in half again, folding from top to bottom. Your fabric should be  about 1/4 the length of its width (if your fabric is 43" wide, it should be about 10.5" high")
Fold your fabric around the household item until it is folded all the way up.
 
If you'd like,  use a paper clip or pin to secure the end of your fabric.
Now slide your book, cutting board, diploma, or whatever you are using out.
Repeat Annnddd stack.

If you want to use bolts, like I do, start by purchasing comic board backing boards. You can get these boards which come in packs of 100 for less than $10 from Amazon .Great deal. I bought 1 pack and thought it was plenty. I was wrong, I ran out. I had NO clue I had over 100 different fabrics! These boards are certified acid free so your fabric will be safe. They were a little thinner than I expected, but are perfect for the job. Folding on bolts is similar to how to fold fabric.

With your fabric fresh out of the dryer (or if you choose not to wash start by unfolding your fabric however the cutting counter staff had it folded)

Fold selvedge to selvedge, with the printed side up and closest you

and in half one more time

If you are working in a small space you can do this as you go

 Fold all your fabric up around the bolt and fold over the last few inches

Using a paper clip or pin, take the last layer of the bolt and secure the folded edge.

Now put away all your fabric and admire how nice and organized it is!

Friday, January 27, 2012

Crafting Space

Michael and I have been blessed with an incredible home. We have 1800 square feet in our townhouse that includes 4 bedrooms, 3 and a half bathrooms, eat in kitchen, living room and den with a kitchenette/wet bar. Although Michael has an hour+ commute each way, having a big home, with a little back yard that backs up to the woods seems worth it. That being said, I'm not the one driving 2.5 hours each day :) Michael often mentions how much he misses his 12 minute commute, unfortunately, comparable townhouses in Alexandria go for well over $2,000 each month. Although we probably could live in the area, it's just not worth it for us. The first room we set up when we moved in was Michael's music studio that is the home to his arsenal of string instruments. Then the rest of the house kind of fell in place. We decided that the small bedroom upstairs would be my office where I could pay bills and work on school work and papers. For the first 6 months of living here it was our junk room, where everything that didn't have a place found a home. When my mom sent down all my childhood furniture I was able to set it up as a craft room and sewing studio. Previously, fabric, cake decorating supplies, knitting needles and yarn, and pretty much any other crafting supplies I owned lived in big plastic tubs which made it difficult and messy to find what I needed. My studio is finally 100% set up and I couldn't be happier.:)
This dresser holds knitting supplies, yarn, ribbon, felt, paper and office supplies, inks & stamps, glass etching supplies, and my keyboard and mouse for my computer.

 The left corner of the room is the home to my printer and embroidery machine. 
 This is the view from the door, sewing machine in the corner and fabric storage on the right, the dresser has 2 drawers full of fabric and the top drawer is used for packing material.

 The rack holds my second sewing machine, a basket of goodies, thread organizer, mail scale, patterns and the bottom two shelves are filled with fleece and minky.

My fabric stash

 The closet stores mailing  boxes for my shop, 1 bin of keepsakes, 1 bin of scraps, the box in the upper left hand corner, along with the plastic drawers are filled with cake decorating supplies
 Here is part of a project I've been working on for a few weeks. Love the lil' doggy :)


and Michael got his new guitar this week, the store he ordered it from loved it so much they decided to order one to keep in store. I don't blame them. It looks awesome :)

Thursday, January 26, 2012

Starbucks Caramel Apple Spice Copycat

Apple Pie a la mode... er... in a cup. This, in my opinion, is the best non coffee drink available at Starbucks. In the summer I prefer the Light Mocha Frapp, but come October, its Caramel Apple Spice. All. The. Way. Most days, when I really want one, it's freezing out (which is why I want it so bad in the first place) and I don't feel like getting my coat and shoes on (lazy, I know) and getting in my freezing cold car, and driving all the way to my nearest Starbucks (which is a whole 3 miles away), getting out in the freezing cold, standing in line, waiting for my drink, getting back in my car- which may or may not still be freezing, and driving home. So I looked online and here it was-- in all its glory. You'll never have to go to Starbucks for a Caramel Apple Spice again... well... with the exception of picking up a bottle of Cinnamon Dulce.


Ingredients for a Tall Caramel Apple Spice


12 oz. Apple Juice (Starbucks often uses TreeTop, but any kind will do)
2-4 Tbs (or 3 pumps) Starbucks Cinnamon Dulce(to taste). If you aren't picky,  I recommend the Sugar Free kind (which has 0 calories). Normal Cinnamon Dulce has 80 Calories in 2 Tbs! ($6.95 from Starbucks, when you buy ask if they have any extra pumps to give you)
Whip Cream
Caramel Syrup 

Directions  
1. Heat your apple juice and cinnamon dulce in the microwave or on the stove. (you'll want it hot like coffee)
2. Pour in cup and top with whip cream and caramel syrup

There you have it! Wasn't that better than driving to Starbucks?

Sunday, January 22, 2012

Diaper Changing Pad Tutorial


Diaper Changing Pad Tutorial

I was inspired by a diaper changing pad on the great blog sewtakeahike. Although I have no kids, and no real reason to make a diaper changing pad, I thought it would be fun :) This project takes and hour or two and is perfect for baby showers or new moms. I looked through it a few times the tutorial and decided to make a few changes. This is what I came up with. Enjoy!

Materials Needed:
13" of prequilted cotton
13" of cotton fabric for front (unless directional, in which case 24" will be needed)
13" of cotton fabric for back (unless directional, in which case 24" will be needed)
1 package of Bias Tape (or premade)
1"x1" piece of Velcro
Thin sheet of vinyl (optional)

Step 1:
 Gather your materials & print your template

Step 2:
Measure & Cut Fabric
For the front: cut 2 pieces  to 4.25"x13"
 and cut 1 piece  to 16.5"x13"

For the back: cut 1 piece to 13"x24"

Step3:
Sew the front panel together, curve the corners, iron the seam, and pin everything down
With the wrong sides out, sew together the front panel, one strip on the top, one on the bottom with 1/4" seam allowance. Iron the seams down and pin together the top, middle, and bottom pieces. The front and the back should be the right way out (if you are adding vinyl, now is the time).


Mark each corner with your printed template and carefully cut.


Each piece that cut off should be identical in shape and size


Step 4:
Sew the pad together
Here comes the fun part!
Sew around the whole changing pad using 1/4" seam allowance. If you want to be extra safe, you can zig zag around the outside.

Step 5:
Bias Tape
Open up your bias tape and pin around the outside. If you'd like more info about bias tape, you can check out this tutorial by Smashed Peas & Carrots. 

Using the crease as a guide, sew the bias tape down (a walking foot would be very beneficial here! Be sure you take out the pins as you go, you don't want to break a needle!)
Once the tape is sewn all the way around, close and pin it down, being sure to cover the stitches on the back. Sew as close as you can to the inside edge, but be sure the back side of the tape is being picked up.

Step 6:
Add velcro
 Your almost done! The last step is to sew on the velcro. I strategically placed my fuzzy velcro on the front in the tummy of the elephant. but you can place yours 6 inches from each side (right in the middle!) and 10 inches from the bottom. The loop side (or scratchy side) goes on the back and  can be place 6 inches from each side and 1.5" from the top. So in short
Front: 6" from each side, 10" from the bottom
Back: 6" from each side, 1.5" from the top


 Great Job!
Yours should resemble something like this!


PS I got this great Michael Miller fabric here, check out this shop for great deals on fabric!

Tuesday, January 17, 2012

Buffalo Chicken Dip

This is by far one of the best buffalo chicken dip recipes I've tried... it's perfect to take to a Super Bowl party!

Buffalo Chicken Dip

 adapted from Penzeys Spice Catalog


Step 1: Cook your chicken. I was feeling lazy so I threw frozen chicken in the crock pot with a liner. So easy.

Step 2: Preheat your oven to 350 and shred chicken. If you have a stand mixer, throw it in there (still warm/hot), mix on 4-6 with paddle for 20-30 seconds. If not. small chicken cubes are okay if you don't want to shred the chicken.

Step 3: If using Ranch mix, combine dressing mix with water, let stand 5 minutes. Add buttermilk and mayo, mix until smooth. Add Ranch, Franks, and cream cheese to chicken and mix well.

Step 4: Spread dip in shallow dish and top with cheese. Bake for 30 minutes at 350.


Buffalo Chicken Dip
1 1/2 tsp ranch dressing mix (if you dont have any on hand, you can use about 1/3 cup regular ranch and omit water, buttermilk, and mayo)
1 1/2 tsp water
 2 cups of cooked, shredded chicken (or 2 cans of chicken breast in water, drained)
2 8 ounce pgks cream cheese, room temperature (or low fat cream cheese)
1/2 cup Frank's Hot Sauce (more or less, if desired)
1 cup cheddar cheese (or monterey jack)

DIRECTIONS
Preheat the oven to 350. In a mixing bowl, combine the dressing mix with the water. Let stand 5 minutes. Add the buttermilk and mayo and mix until smooth. Add the cream cheese, Franks, and chicken, mix well. Put the mixture in a shallow baking dish, I find a pie dish is the perfect size, but any 8x8ish pan will do. Top with cheese and bake for 30 minutes. Serve with tortilla or corn chips.

"Serves 24 as an appetizer" <-- That's a lie. Don't believe it.

You can check out the different nutritional values here: Buffalo Chicken Nutrional Values

Monday, January 9, 2012

Stinkin' Good Banana Pie

This week I combined two recipes that I had pinned. One with instructions to make "caramel" from sweetened condensed milk in the crock pot, and one for "sinful banana pie". This pie was so good. I don't know that I would characterize the sweetened condensed milk as caramel, but I've also seen it called "dulce de leche" and "toffee" in my opinion... It still tastes like condensed milk... The pie was so good. I decided to make 6 mini pies since I think they are cute :)

Ingredients:
Sweetened condensed milk
3 bananas
Graham Cracker pie crust
Whip Cream
Pecans (optional)
First cook the condensed milk in the slow cooker on low for 8 hours. Be sure you cover the WHOLE can with water, you don't want it to EXPLODE. Also, cover the bottom of your crock pot with something (saucer, liner, wax paper) or you will get rust on the bottom.

Slice the bananas into the crust.

Cover with the caramel/dulce de leche/toffee/condensed milk/whatever you want to call it

If you are going to add pecans, now is the time.

Cover with whip cream

(you'll have to imagine this picture... they were gone before I remembered to take a photo....)
Refrigerate for at least one hour.

SO easy. SO good. The most work you'll do is shoveling it into your mouth! Make sure you cover the WHOLE can with water... I'd feel really bad if your kitchen blew up... I think next week I'll try a craft... I've been so busy with my embroidery machine I haven't had time to try any!

Saturday, January 7, 2012

Chicken and Broccoli Alfredo Casserole, lightened up

Southern Living


So this will be the first of the recipes that I have tried from Pinterest and blogged about. Michael picked out Southern Living's "Three Cheese Pasta Bake".


 This is part Mac N Cheese, part Lasagna, part Fettuccine Alfredo.
Since Michael and I are trying to lighten things up I decided to switch a few things with this recipe.The original recipe called for regular Alfredo, sour cream, and ricotta cheese. I used light Alfredo, plain non fat Greek yogurt (in place of the sour cream), and non fat ricotta. To make it a bit heartier, I added chicken breast and broccoli. By making these changes I was able to cut lots of calories out of the dish while still adding chicken and broccoli.

This recipe was so yummy. I'm glad I made the changes I did. This dish definitely didn't taste lightened up. It had the taste of a classic fettuccine alfredo dish, with the textured of lasagna. The only thing I'll change the next time I make it (and I will be making it again) is seasoning the chicken.

Chicken and Broccoli Alfredo Casserole
Adapted from Southern Living
10 Servings
427 Calories/Serving
10g Fat/Serving
$2.36/Serving
  • 1 lb package Penne 
  • 2 (10-ounce) containers refrigerated light Alfredo sauce  
  • 1 cup Plain Non Fat Greek Yogurt
  • 1 bag of Steamfresh Broccoli; thawed but not cooked
  • 2 Chicken Breast; cooked & chopped
  •  15 ounce non fat ricotta cheese
  •  1 single size egg beater (or two eggs)
  • 1/4 cup grated Parmesan cheese 
  • 1 1/2 cups reduced fat mozzarella cheese 

Preparation

  1. Preheat oven to 350°
  2. Prepare penne according to package directions; drain and return to pot. Do not over cook.
  3. Stir together Alfredo sauce, yogurt, chicken, and broccoli; toss with penne until evenly coated. Spoon half of mixture into a lightly greased 13- x 9-inch baking dish.
  4. Stir together ricotta cheese, egg beaters, and Parmesan cheese; spread evenly over pasta mixture in baking dish. Spoon remaining pasta mixture evenly over ricotta cheese layer; sprinkle evenly with mozzarella cheese.
  5. Bake at 350° for 30 minutes or until bubbly.
There you have it... The first week of Pinterest.

    Sunday, January 1, 2012

    It's been too long!

    Hi guys! I haven't forgotten about you! I can't believe how FAST November and December went by! Lots has happened in the past month or so!
    • On November 1st, I opened my Etsy Shop, Hunt's Handmade, where I sell handmade heat packs filled with rice. I have the blessing of being a stay at home wife for now but got bored during the day so I decided (with the encouragement of Michael) to sell some crafts. I told myself I would share the news with everyone when I made $1000 or hit 100 sales, whatever came first. Well, I hit $1000 in early December but still wasn't ready to share with everyone so I waited to hit 100 sales. I am currently at 96 so I thought it would be a nice compromise :) It has been a total blessing to be able to sew and craft and make money. I had no idea it would work out so well, I figured I'd be sharing this with you in 6 months or so. Not two. God has more than provided :You can check out my shop here:
      www.brittanyhunt.etsy.com
    •  I successfully (very successfully and single handedly, I might add) prepared our very first Thanksgiving meal. Turkey, potatoes, green beans, collard greens, sweet potato casserole and caramel apple cheesecake. It was so good!
    • Michael and I celebrated 6 wonderful months of marriage on the  December 11th
       
    • Michael has officially completed his first class towards his PhD and I managed to get through history (ugh. I hate history...) with an A.
    •  Christmas was spent in Virginia Beach with our families. Our parents only live 3 miles apart!! It is SOOO convenient for holidays. Apparently we were on the good list this year, we were so spoiled!! My "big gifts" included an embroidery machine, a bluetooth speaker for my computer and iphone, and a mail scale which I so desperately needed for my business. Michael was given several video games, a microphone, and a new electric hollow body guitar.
    • New Years Eve was spent quietly in our home and without a bang, but we are thankful for another year.
    After spending much time on Pinterest, and "pinning" tons of crafts, outfits, stuff to sew, and recipes, but not actually doing them, I decided to put it all into action. Each week I will pick something from my boards to try an,d blog about it. I'm not really sure in what format this will be yet, but I am so excited about it!! I am letting Michael pick the first one so I'm sure it will be a yummy recipe! Stay tuned, friends :)